by Bill Reilly
Why are many metrology labs still in the stone age given massive technological advancements?
The metrology lab has always been a crucial part of the manufacturing process, but while advancements in manufacturing technologies have been embraced, I’m not sure the same can be said for metrology equipment.
Often the metrology lab is overlooked when talking about streamlining the manufacturing process, when in fact, it’s just as crucial as the manufacturing itself. In fact, it should be considered as part of the manufacturing process and weighted equally with any other process involved.
Let’s say you’ve invested millions of dollars on new five axis machining technology and have managed to increase your throughput by 50 per cent. You still need to inspect the parts before you can ship them to the customer. Have you invested in your metrology lab to match this increased throughput? If not, you face a bottleneck and your delivery times have not improved to match your investment.
Accuracy, repeatability, speed, software and ease of use in metrology equipment and tools have all taken giant leaps in the past 10 to 15 years.
 Touch trigger is probably the most widely used type of sensor, coming in many different varieties. These have traditionally been three axis systems, relying on the CMM to position and move the sensor 100 per cent of the time. These days, the sensor market is varied. Renishaw’s PH10 is a three axis articulating head that locks every 7.5° (there are some that lock every 5.0° or 2.5°). The limitation of a three axis head (or a fixed head for that matter) is that the part needs to be squared up to the machine axis and/or the head axis to avoid “shanking out” while measuring. The Renishaw PH20 is a five axis head that articulates to infinite angles (in combination with CMM moves), resulting in three times quicker cycle times (on average) and eliminates figuring out what angles are necessary for any given inspection program, as well the need to “square up” the part to the CMM/probe head. The PH20 aligns the head angle to the PCS (Part Coordinate System) as opposed to aligning the part to the fixed head angles available. The PH20 also offers three axis probing (at any angle) and five axis probing, using what’s called “head touch.” Head touch uses the head axis to probe points, reducing or eliminating the XYZ machine movement. The PH20 has a “head map” giving it the advantage of increased measurement accuracy when using more head movement/less machine movement. There’s an algorithm working in the background (in the Renishaw UCC software) that optimizes the path to minimize the machine movement by adjusting the head angle. One of the greatest advantages in using a five axis head is the speed of point collection. This advantage is noticed most on hole/bore measurements, where points are taken at least three times faster than a typical three axis system.
Calibration time is another advantage with five axis technology. Instead of having to decide which angles are required ahead of time and calibrating each angle, the PH20 calibration is done in one shot, giving you access to infinite angles, at any time.
Another advantage is the reduction in tip sizes required. Traditional three axis systems require you to use larger probes to reach deeper features to minimize the chance of “shanking.” With a five axis system, much of your programming can be accomplished with one probe size since shanking is eliminated. Head probing in combination with five axis moves (XYZ movement with simultaneous head rotation) is where you experience the decrease in cycle time.
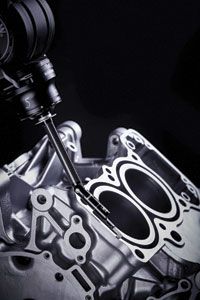
 Scanning sensors have probably advanced further than anything else. At one time, you had the choice of either a fixed head or articulating head, three axis scanning system. 1Source houses the Renishaw Revo2, a five axis scanning head that minimizes the machine movement by using the head axis to reach the measurement surface, minimizing or eliminating the movement of the CMM’s XYZ axis, providing drastically increased measurement speed/acceleration and accuracy. It scans at speeds up to 500mm/sec with no loss in accuracy or repeatability (1Source Metrology uses Revo2 on our Wenzel LH 12/20/10). The real metrology happens by directing a laser beam down the carbon fibre shaft, to the end of the probe holder where the stylus is attached. This allows for “real-time” tracking of probe deflection, as opposed to the typical “calculated probe deflection” done during probe calibration on a traditional three axis scanning system. The Revo2 offers increased throughput rates with no loss of accuracy at high scanning speeds. It also offers multi-sensor capability, with the addition of three axis scanning (RSP3 for crank or star styli), video probe (RVP) and Surface finish tools (SFP2) allowing for surface finish measurement virtually anywhere utilizing five axis movement.
 All Renishaw five axis heads operate via the UCC controller. The UCC controller is an I++ controller, which opens you up to various software options such as Renishaw Modus, Wenzel Quartis or Open Dmis.
Worth a mention is EasyCmm software, developed by Globus in Israel. It gives users the ability to run any I++ CMM software on any CMM. No longer are you tied to the software that came with your CMM. EasyCMM gives you the freedom to choose, and the flexibility to decide your preferred measurement software and to connect it to your preferred coordinate measuring machine.
I could write a thesis on the new developments in five axis technology, but suffice it to say, this is quickly becoming the new norm and is absolutely worth a look. You may be surprised how budget friendly it is. SMT
Bill Reilly is a partner in 1Source Metrology Corp. specializing in five axis technology and CMM programming support onsite or offline for any CMM and software on the market.
